# Contacts and contact requests
Schlagwörter: Ad hoc meeting, Invite contacts, Invite clients, Invite customers, Invite people, Invite friends# General information
Licence holders can make contact with various other people on the platform. To establish contact with another person, use the contact requests. You will only be in contact with each other once your contact has accepted the contact request.
Note: You do not need contact requests for ad hoc meetings:
You only need this function if you want to work with accounts and groups and thus give participants permanent access to the session content.
If you only want to work via a session link and guest access, then use the ad hoc sessions without your own contacts and groups instead.
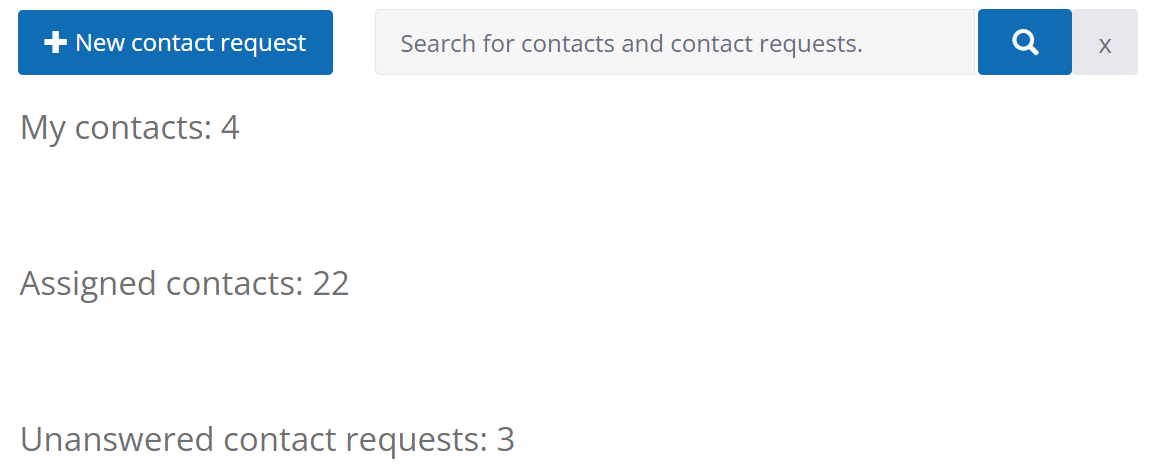
To manage your contacts, select the "My contacts" menu item in the "Administration" menu. A list of existing contacts is displayed there.
# Categories
The following categories can be shown or hidden by clicking on the heading:
- My contacts
People for whom a contact request has already been successfully made. - Assigned contacts
Persons who have been administratively assigned via their own organization. - Unanswered contact requests
Contact requests that have not yet been processed.
# Search
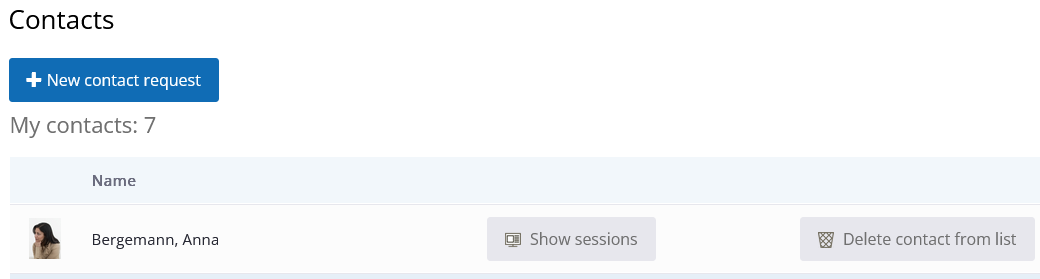
You can search for specific contacts by entering a search term in the input field and then clicking on the search button (magnifying glass). All matching contacts from all categories are searched. All contacts with a matching first name, surname or e-mail address are found.
# Delete contacts
Contacts can be deleted from the contact list using the "Delete contact from list" button.
# Add contacts
Link to the video instructions for creating contacts
A new contact can be added using the "New contact request" button. The licence holders only see their own contacts.
Note: A contact request is only valid for one person at a time. Each person needs their own contact request.
Click on the "New contact request" button to open the following window.

By entering a name, you can better identify the contact request below. identify the contact request. Please note that this name will be displayed in the following places until of the contact request is displayed in the following places:
in your list of open contact requests
in the predefined e-mail text, if you use the e-mail function of the contact request email function. You can customise this text before sending the email before sending the e-mail.
in the lists of participants if you have created one or more groups or sessions and have added the contact request. sessions and have added the contact request before the contact request has been contact request has been answered
If you use personal data, we would like to point out the current legal situation that you require the consent of the respective person for this as this designation is stored temporarily. If this consent is not available, we recommend that instead of personal data the initials of the persons who are not personal data, for example. data, for example.
After entering the name (here in the example the initials "PM"), the contact request is generated and displayed:
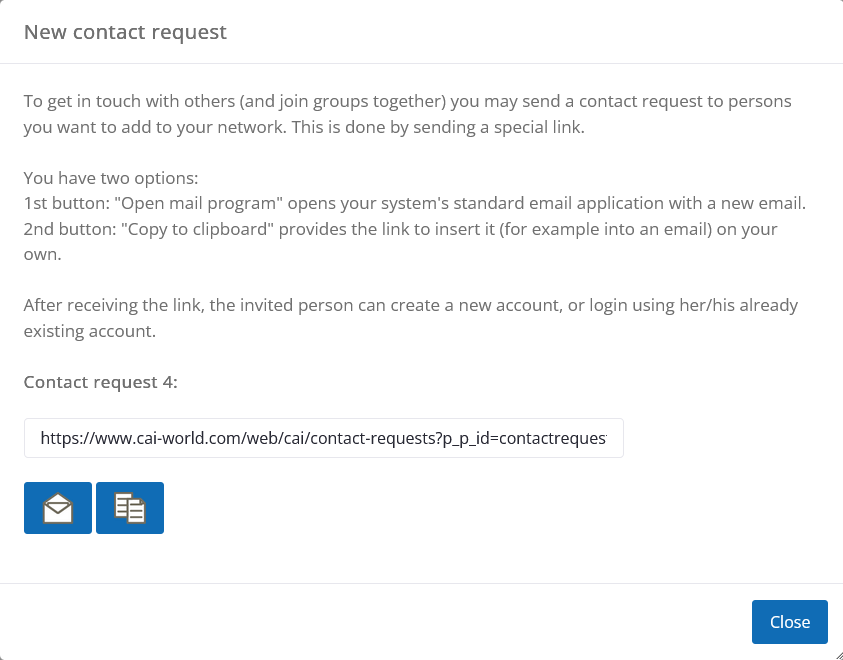
The visible link can be sent directly by e-mail using the "Open mail client" button or copied using the "Copy link to clipboard" button and pasted later into a message or specially created e-mail.
If no e-mail client opens when you click on , or the wrong e-mail client opens, you should check the default application for e-mails in the operating system. In Windows, this setting is called e.g. "Default apps". Alternatively, you can just copy the link and use it to write an e-mail in the usual way.
# The view of invited contacts
As soon as invited contacts receive the email, they can follow the link and decide whether they want to accept the contact request:

The next step is to register a contact account free of charge or to log in with an existing account.
When sending contact requests, it is therefore not necessary to know whether the person in question already has an account or not. It is also not necessary to know which e-mail address they wish to register with.
If contact requests are accepted, the inviting person will be informed of this in your account and also by e-mail. The new contact will also appear in your contact list.
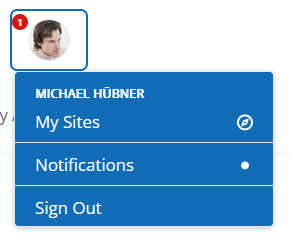
The number of notifications in your account is displayed next to your profile picture (top right):