# Breakout Sessions: Facilitating Small Group Work Efficiently
Keywords: Breakout sessions, small group work, breakout room, copy to breakout session, group work, moderation, facilitationInteractive sessions often gain quality through the targeted use of group work. With Breakout Sessions, you can move participants from the main plenary session into smaller, separate workspaces.
In these protected areas, both audio and video connections are limited to the respective group members, enabling focused and undisturbed collaboration.
Video Tutorial
Would you like to see these features in action? Click here for the Breakout Sessions video guide
Expand Table of Contents
# settings Managing Breakout Sessions
Group rooms are managed by (Co-)Group Administrators directly from the main plenary session.
- Open the main menu at the top left.
- Select the entry arrow_split Breakout Sessions.
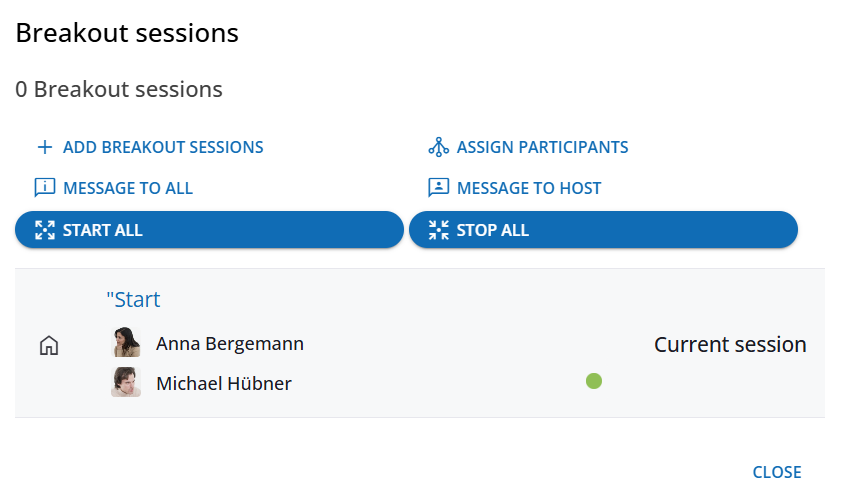
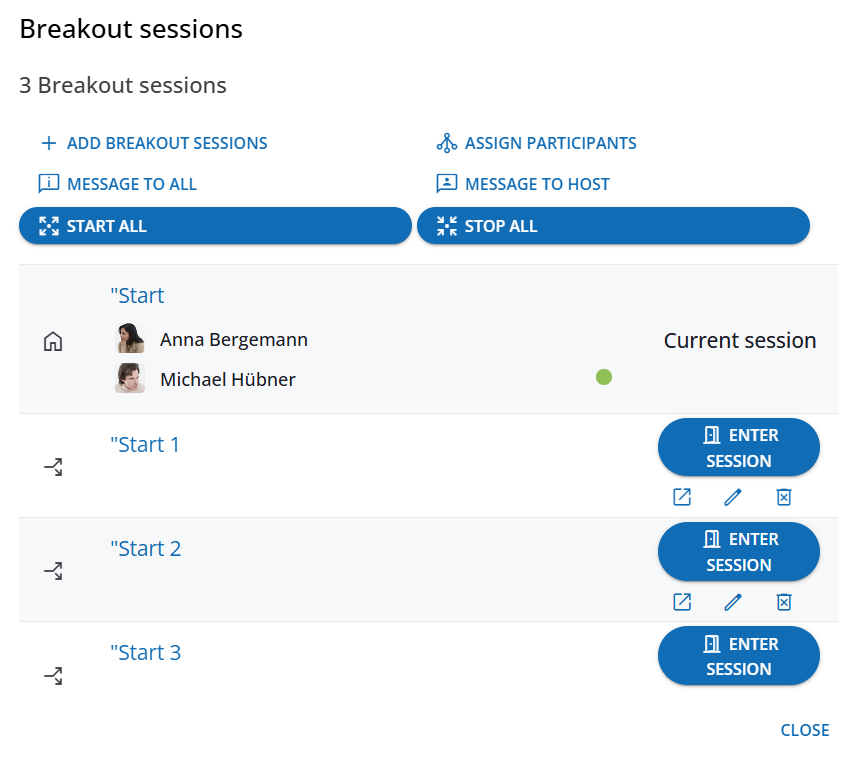
# Creating Sessions
Use the add Add Breakout Sessions button to create multiple rooms simultaneously—either in preparation or while a session is already running. These will then be listed clearly below the plenary session.
::: info Join Parallel Sessions Using the open_in_new Open Additionally function, facilitators can open breakout sessions in new browser tabs. This allows you to be present in multiple groups at once. Tip: Simply mute the audio for each tab in your browser if you only want to actively listen in one specific session. :::
# group_add Assigning Participants
You can flexibly distribute participants (from ad-hoc sessions or fixed groups) among the rooms:
- Random Assignment: Click graph_4 Assign Participants to generate an automatic distribution. You can click the button multiple times to "reshuffle" the mix. Note: Facilitators are not automatically assigned by default, allowing them to switch between rooms as needed.
- Manual Assignment: Simply drag & drop participants from the plenary into the desired room, or move individuals between different groups.
# Controlling Phases: Start and End
Once the groups are set, you can control the work phase centrally:
- arrows_output Start All: Activates the group phase. Participants receive a notification and are automatically redirected to their assigned room.
- arrows_input End All: Ends the group work. You can add a custom text to the automatic recall message (e.g., "We are now meeting in the plenary for the results presentation").
# campaign Communication & Messages
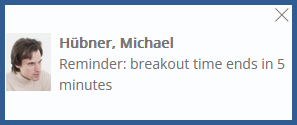
As a facilitator, you can stay in touch with all groups without having to enter each room individually:
- chat_info Message to All: Send organizational notices (e.g., "5 minutes left") to all rooms simultaneously. The message appears at the top right and remains visible until it is clicked or replaced by a newer message.
- 3p Message to Hosts: Participants can send specific questions to the facilitation team. These messages are delivered to all (Co-)Group Administrators in all active rooms.
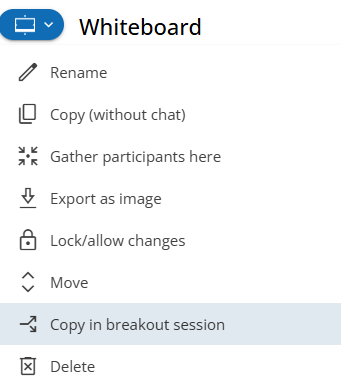
# content_copy Saving Results: Copying Tools
A major advantage is the seamless transfer of content between the plenary and breakout rooms:
- Preparation: At the start, copy a tool containing the task description from the plenary into all breakout sessions.
- Securing Results: After the breakout phase, copy the created whiteboards or documents from the breakout sessions back into the plenary for joint discussion.
To do this, open the tool menu within the respective tool and select Copy to Breakout Session. You can then easily select the target session.
Further Links
Learn more about general functions in the Tool Menu.